


Do you need to permanently and securely delete photos from an iPhone to prevent unauthorized access? Simply deleting them isn’t always enough, as they can sometimes be recovered or stored in the cloud. Fortunately, there’s a straightforward way to erase them for good. This guide will show you how to securely delete photos from an iPhone and protect your privacy.
How to Securely Delete Photos from an iPhone
In this section, we’ll show you how to securely delete photos from your iPhone. Just tapping the trash icon in the Photos app isn’t enough; we’ll explain why later. We’ll also share tips to speed up the deletion process and point out other albums where images might still be hiding.
1. Delete Photos from the Photo Library
The Photos app on your iPhone stores not just the pictures you take but also images received through chats and other apps. To delete pictures from your iPhone, you first need to remove them from the album where they’re stored. Here’s how:
- Tap on the Photos app icon on your home screen to start.
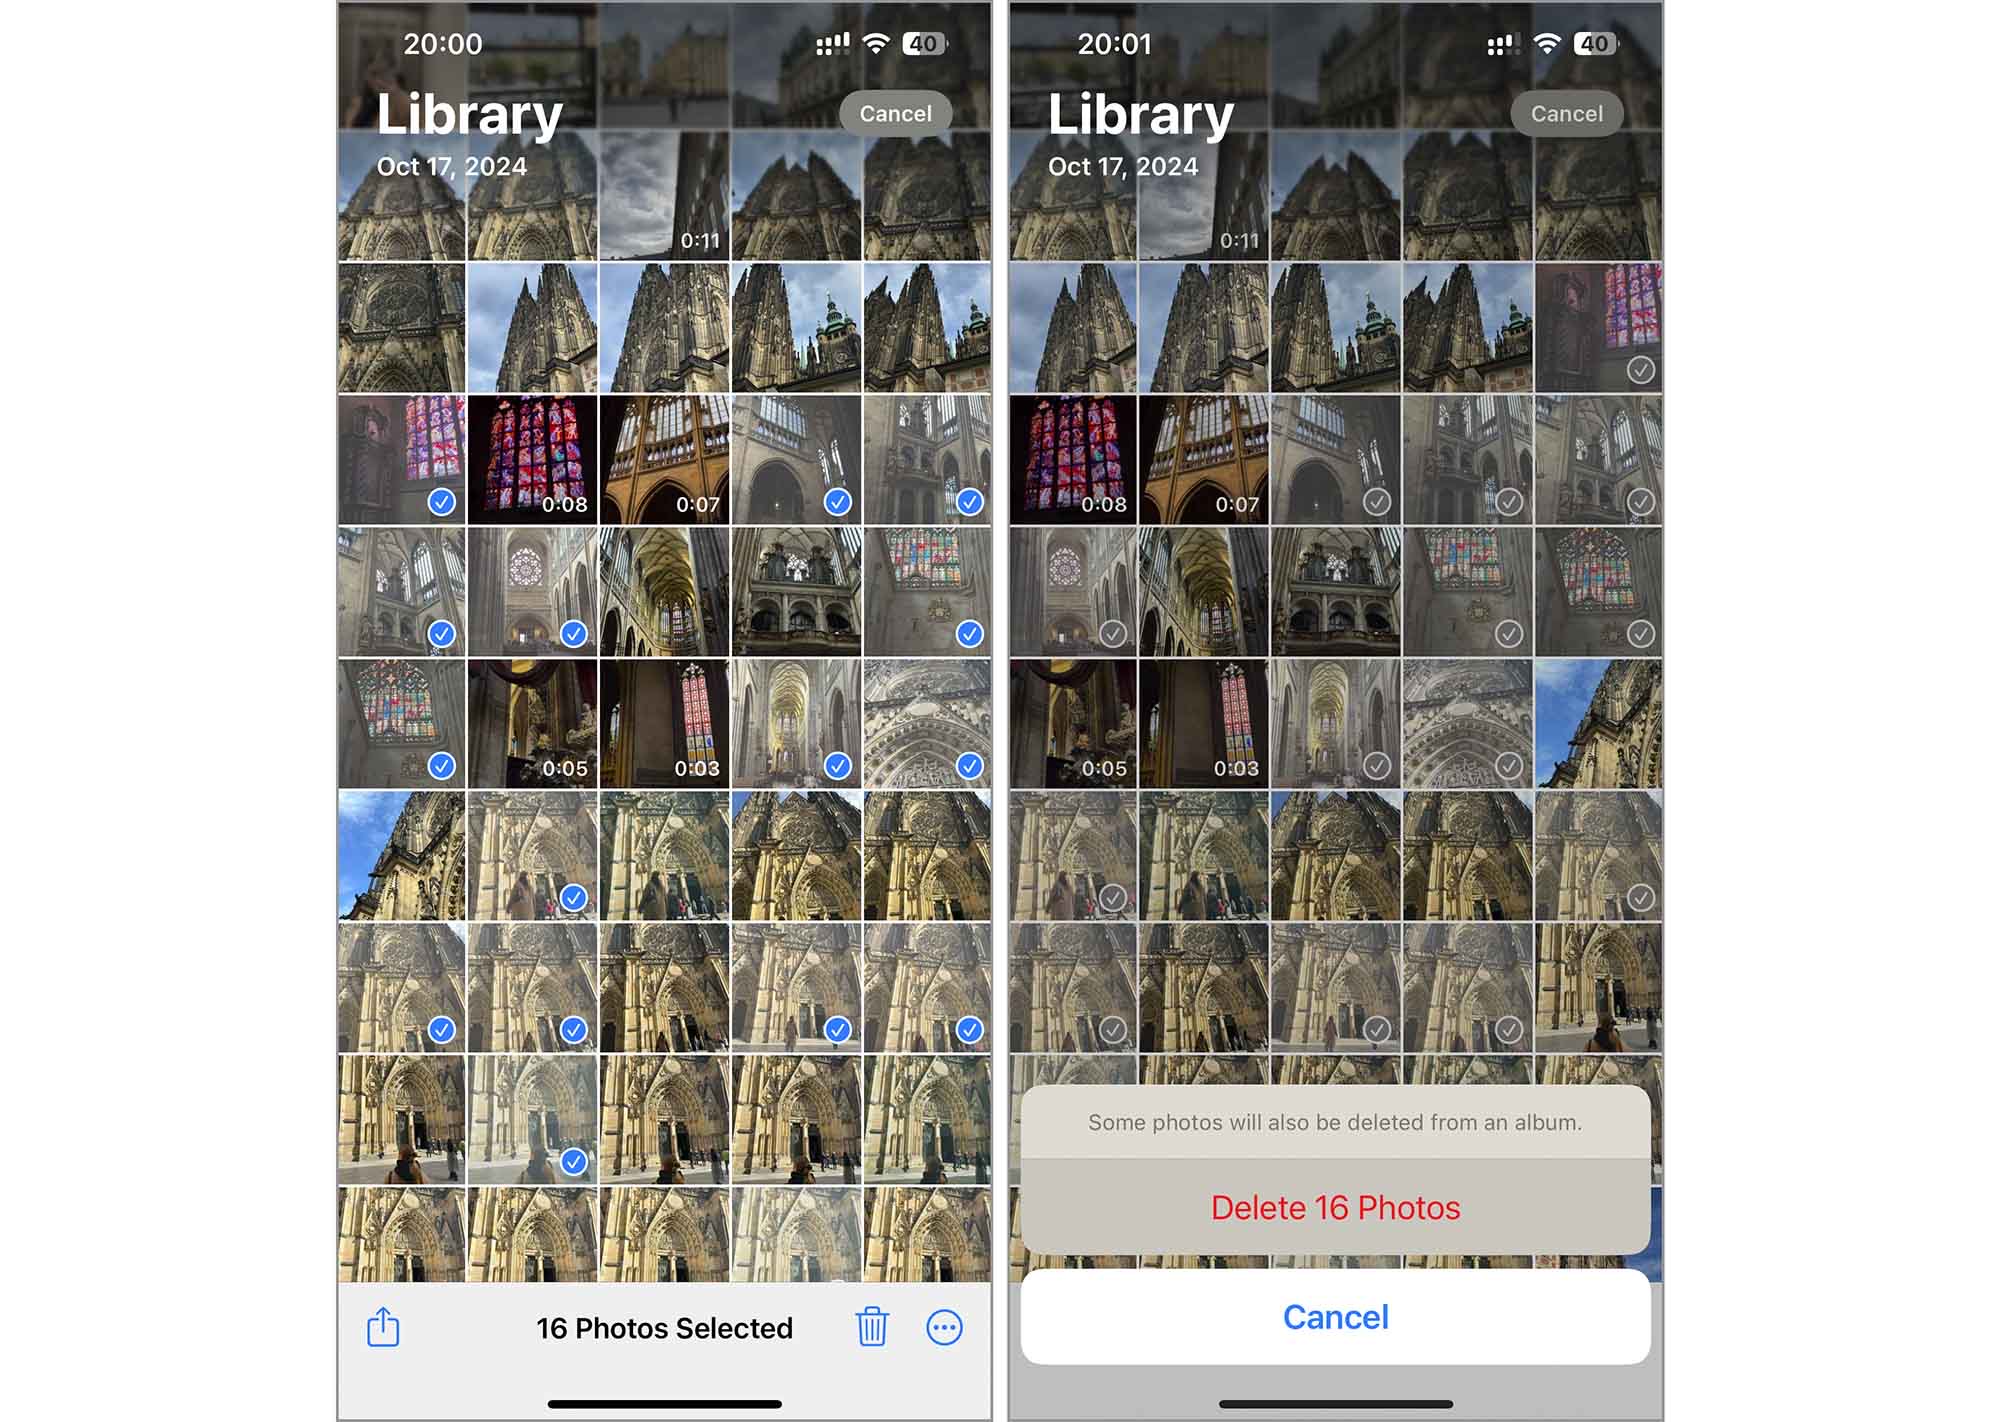
- Browse through your photos and tap ‘Select’ in the top right corner. Then, tap on each photo you wish to delete or swipe your finger across multiple photos to select them quickly.
- After you select the photos, tap the trash can icon at the bottom right corner.
- Confirm your decision to delete the photos when prompted.
Tip: If you organize your photos into folders for structured photo storage within the Photos app, you can delete all photos from an album with a few taps. Open the album, tap ‘Select,’ then ‘Select All,’ and finally, tap the trash can icon to remove all the photos at once.
However, this action doesn’t permanently and safely delete your photos; it just moves them to the Recently Deleted album, where they’ll remain for 30 days.
2. Delete Photos Using Third-Party Apps
There are third-party iPhone apps that can help you manage and delete photos, often offering advantages over native methods. These apps display your photo gallery differently and use unique algorithms to group your images. Below, we’ll briefly discuss three examples of these apps and their key features for deleting photos from your iPhone.
- Clever Cleaner: AI Duplicate Remover is a free app that helps you quickly find and delete duplicate and similar photos. It automatically groups them, allowing you to remove all copies at once or choose which ones to keep. You can also delete all screenshots from your iPhone with a single tap. After using any feature, the app reminds you to clear the Recently Deleted album to guarantee the photos are permanently removed.
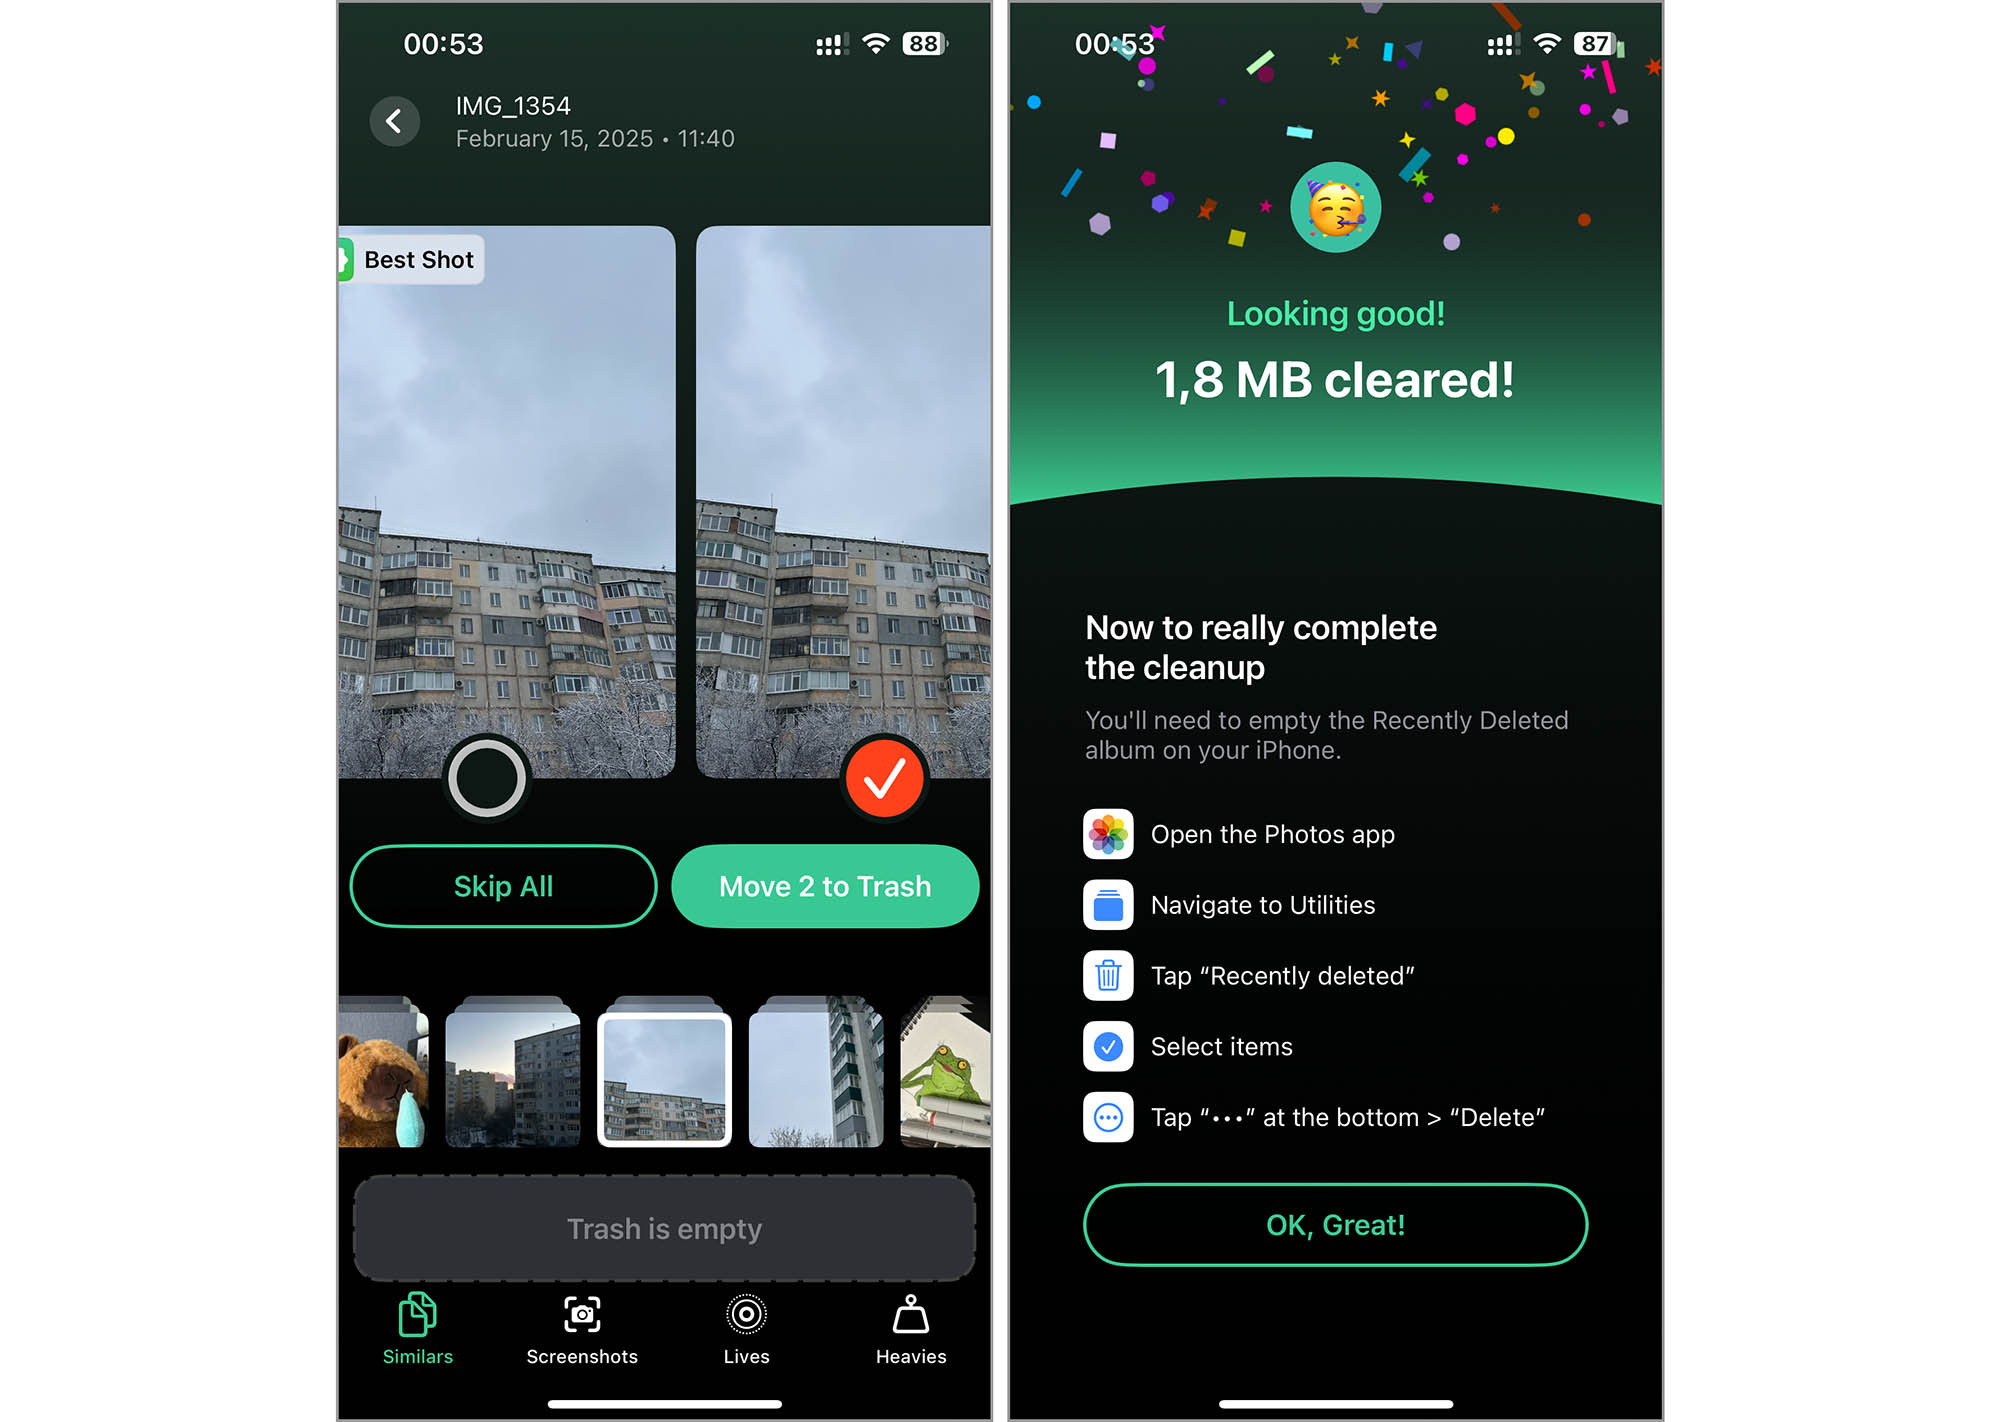
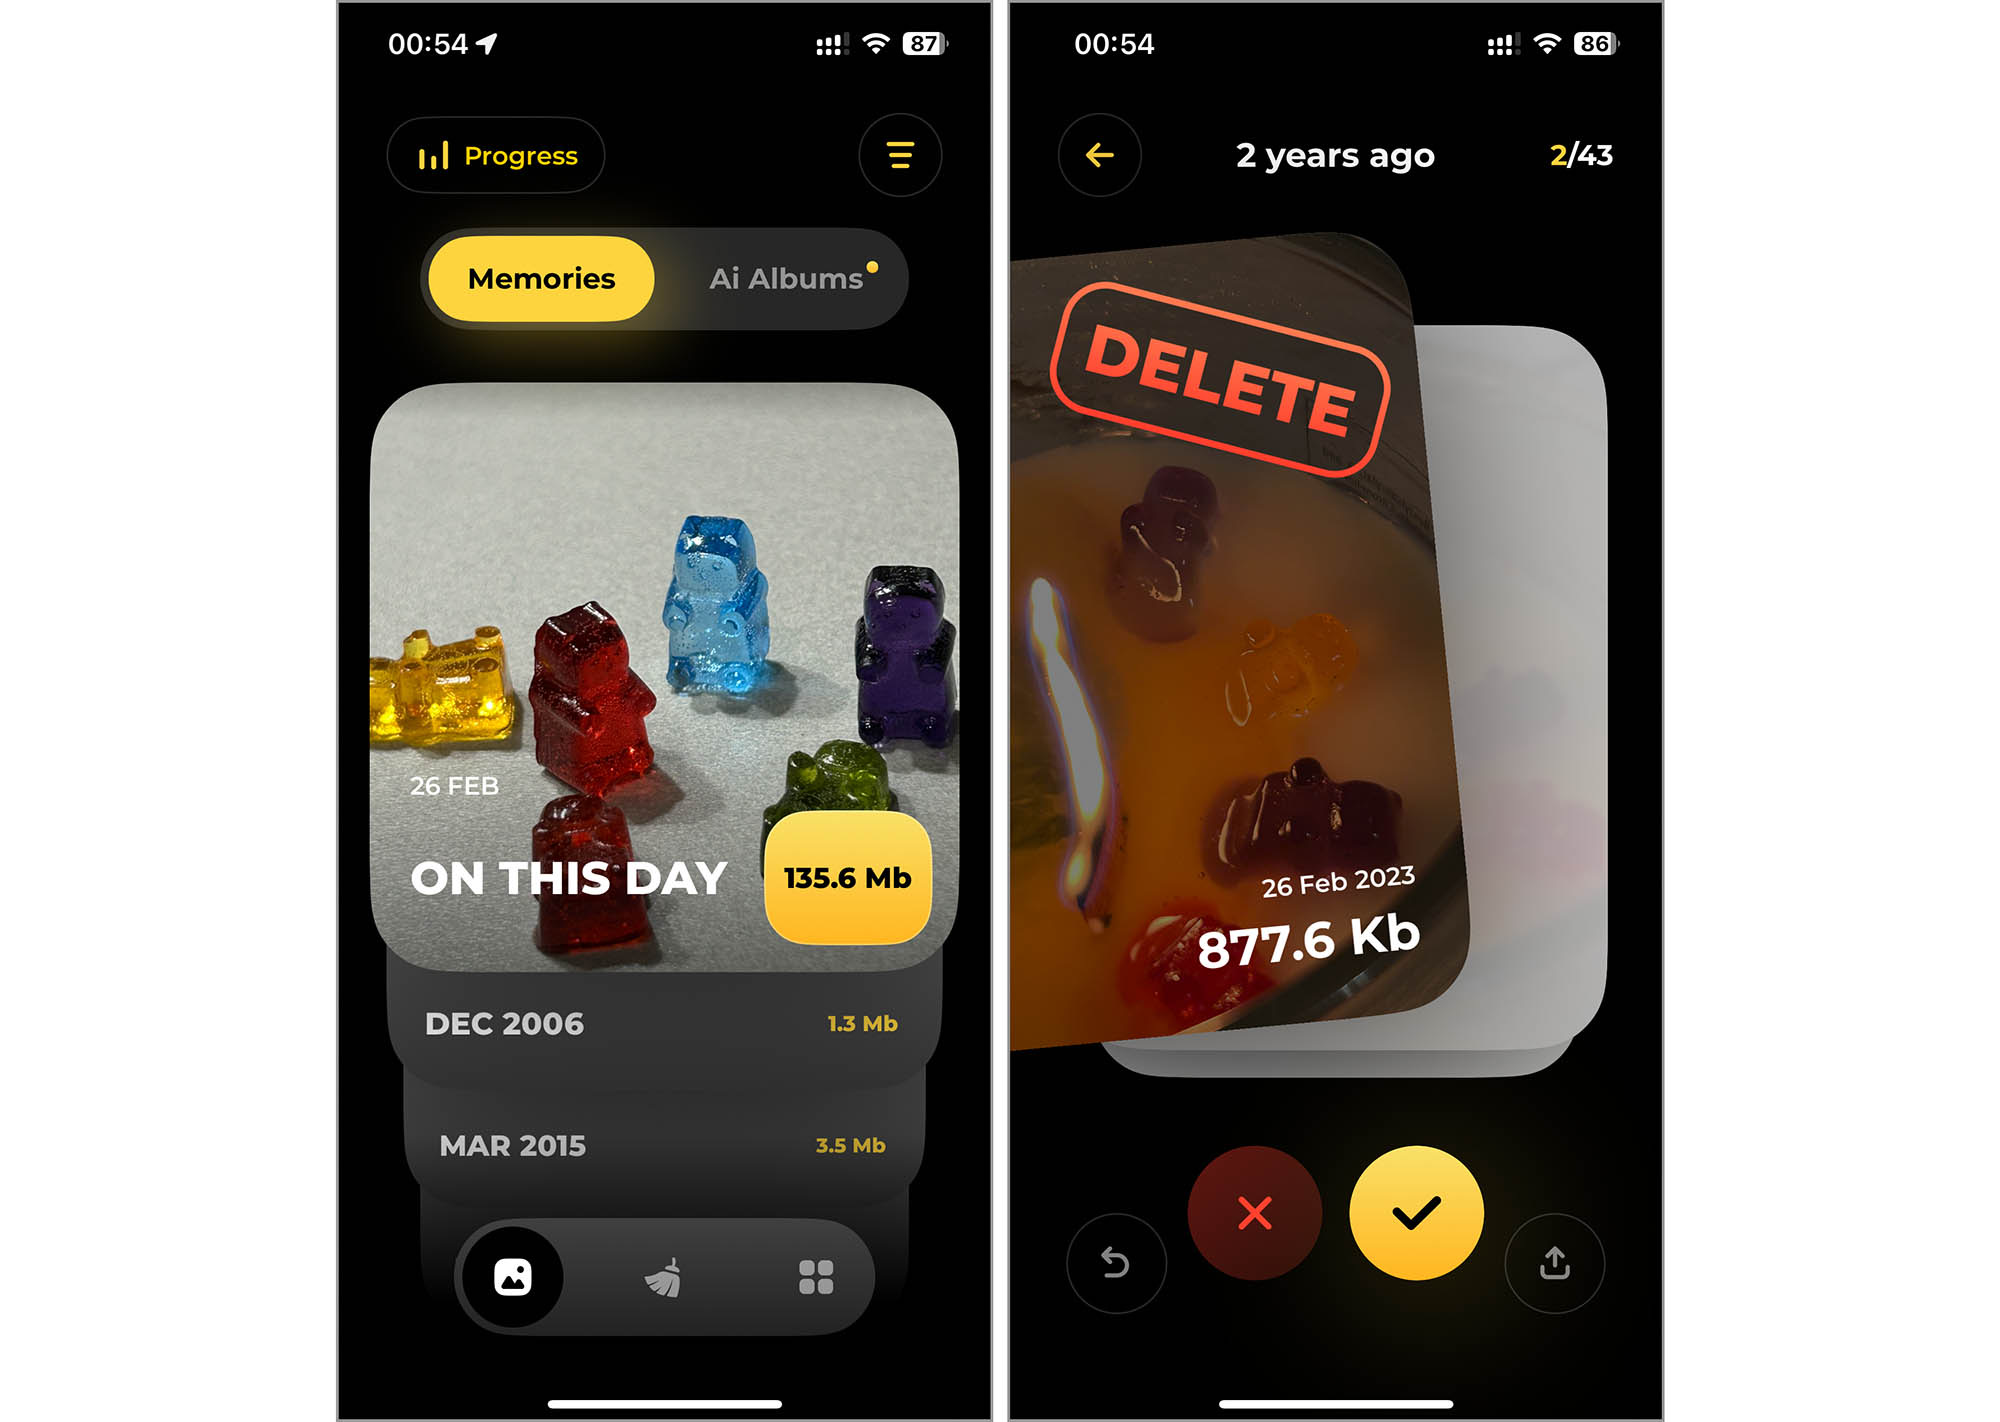
- Hyper Cleaner also lets you delete similar photos, but it offers another standout feature; you can swipe through your photos grouped by the month they were added. This makes deleting photos much faster since you can simply swipe to remove them, rather than manually selecting each one and tapping the trash icon like in the Photos app.
- Photo Cleaner does more than just delete duplicates and similar photos; it also categorizes your images differently. It can identify low-resolution photos and ones where your eyes are closed, which can be useful for you. Plus, the app allows you to select all your photos at once and delete them in a single action.

Keep in mind that while these apps make deleting photos faster and more convenient, they don’t permanently remove them from your iPhone. Instead, they move them to the Recently Deleted album.
3. Check the Hidden Photos
You should also check the Hidden album in your Photos app if you want to confirm your photos are fully removed. This album lets you hide images from your main gallery without actually deleting them, which makes it useful for keeping personal photos private. However, you may have added pictures there and forgotten about them, or even done so by accident, so it’s worth reviewing and removing any unnecessary images.
Tip: If you’ve used a third-party cleaning app on your iPhone, check if it includes a hidden photo feature, often called “Secret Folder,” “Safe Space,” or something similar. If you don’t manually delete photos from these hidden areas, they’ll stay stored within the app, even if they no longer appear in your main photo gallery.
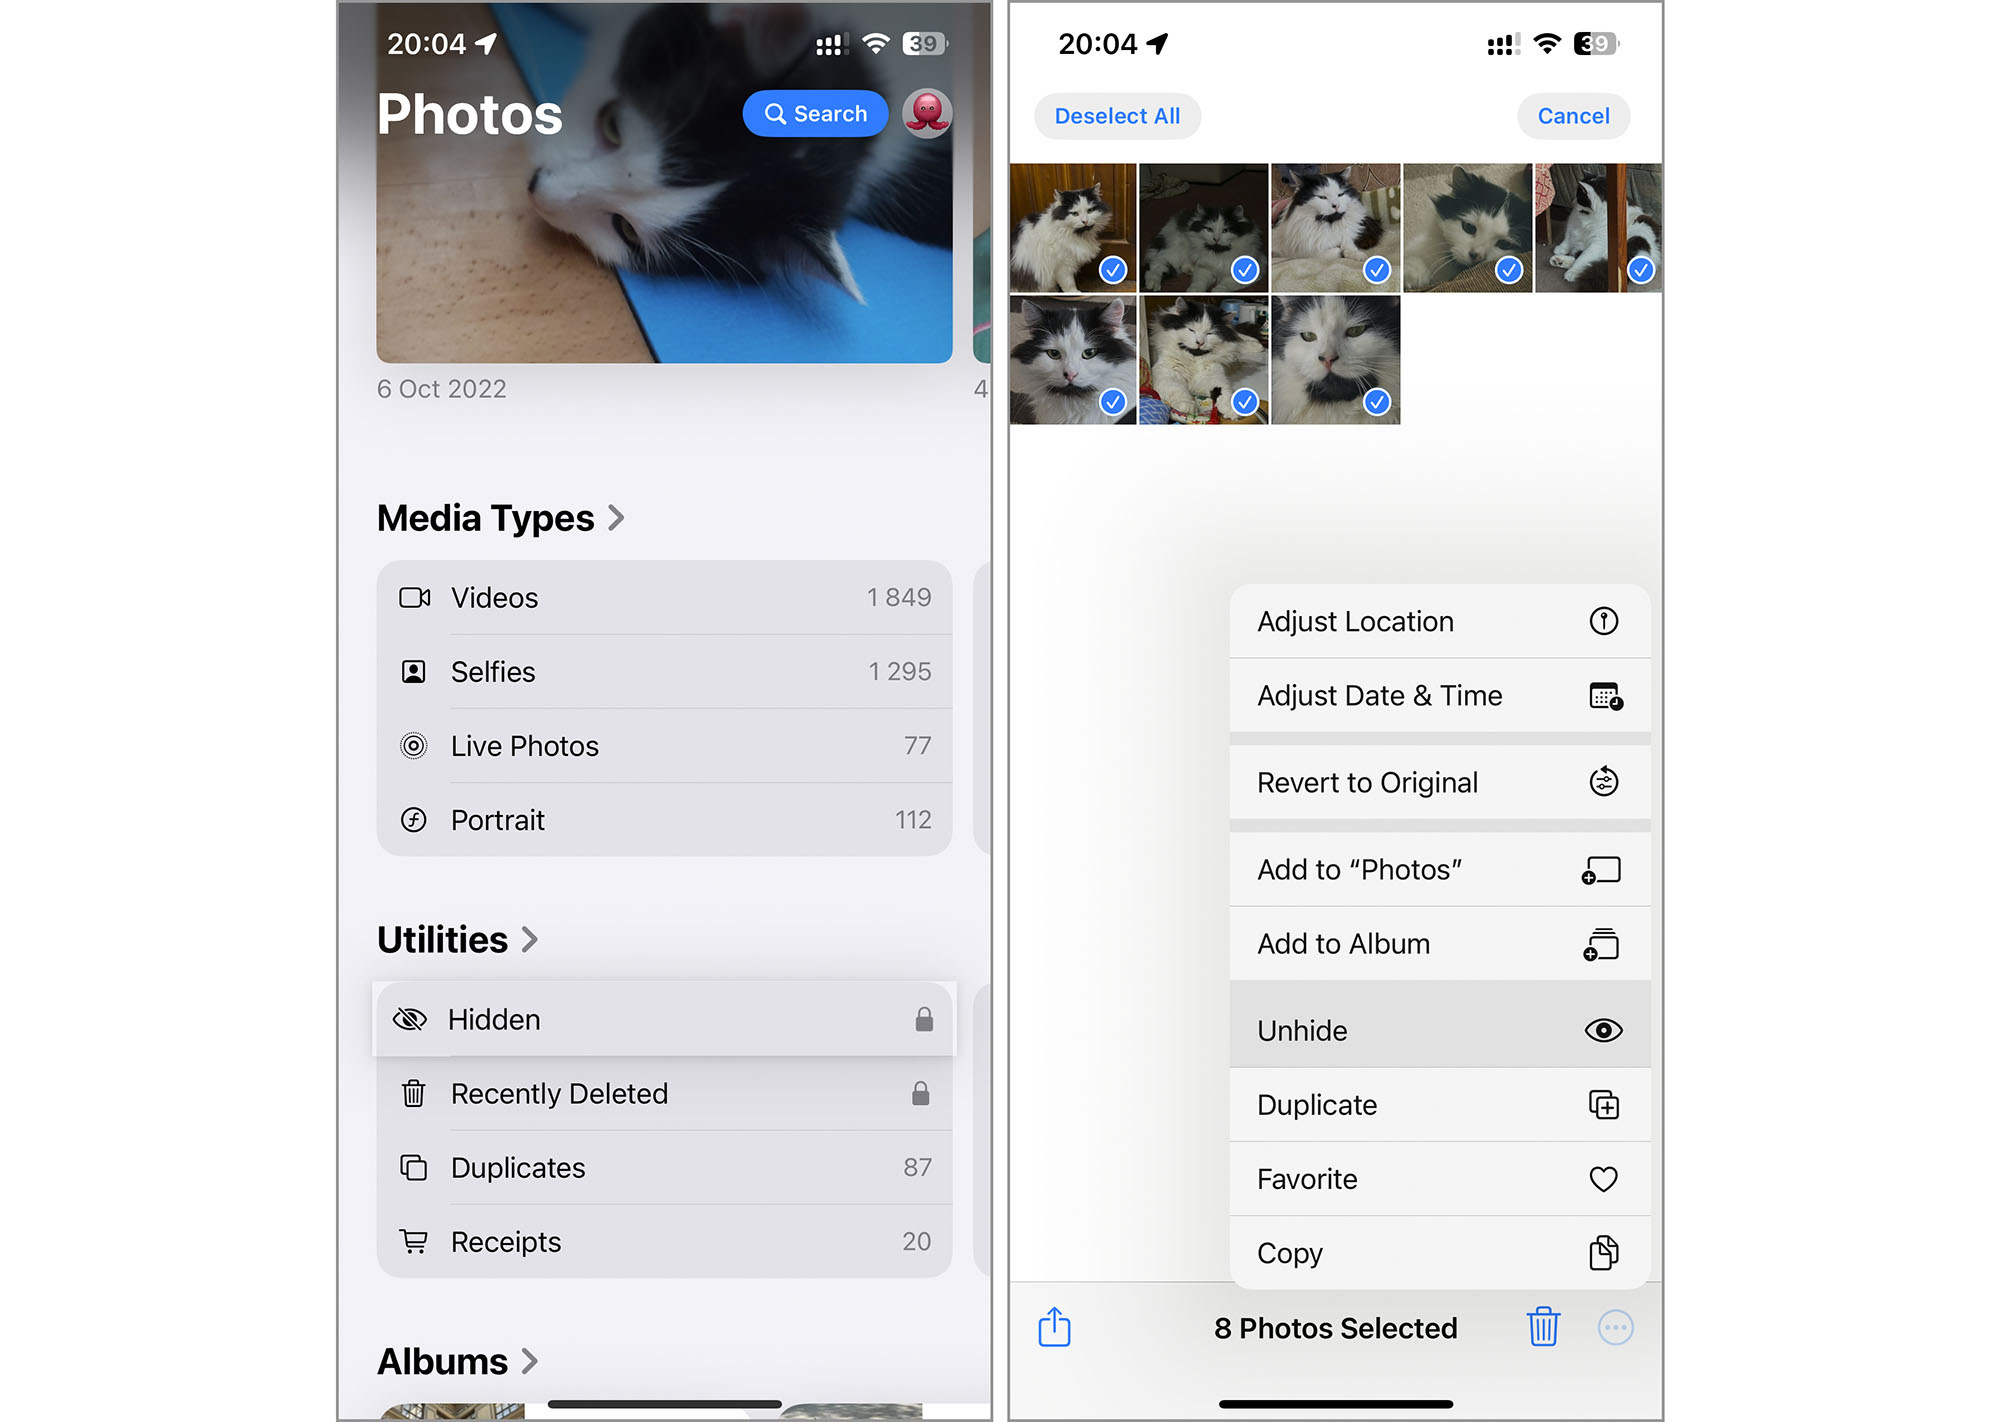
- Tap the Photos icon on your iPhone to open the app.
- Scroll down until you find the Hidden album under the ‘Utilities’ section.
- Tap the Hidden album to open it and view the photos.
- Tap ‘Select’ in the top right corner, then choose the photos you want to delete and tap the trash can icon to delete the selected photos.
Even after following these steps, your photos aren’t permanently deleted yet. To completely remove them from your device, you need to empty the photo trash on your iPhone. We’ll walk you through how to do that in the next section.
4. Delete Photos from Trash on iPhone
After you delete photos, they do not immediately disappear from your iPhone; instead, they move to the Recently Deleted album, where they are stored for another 30 days. During this period, you still have access to these photos and can restore them if you discover that you need some of them or if they were deleted by mistake. In order to permanently and securely delete iPhone photos, you must manually empty this album.
Note: If you use iCloud sync, clearing the Recently Deleted album will also remove the photos from your iCloud storage. However, if you use other cloud services like Google Photos, you’ll also need to empty the trash within that app separately to make sure the photos are fully deleted.
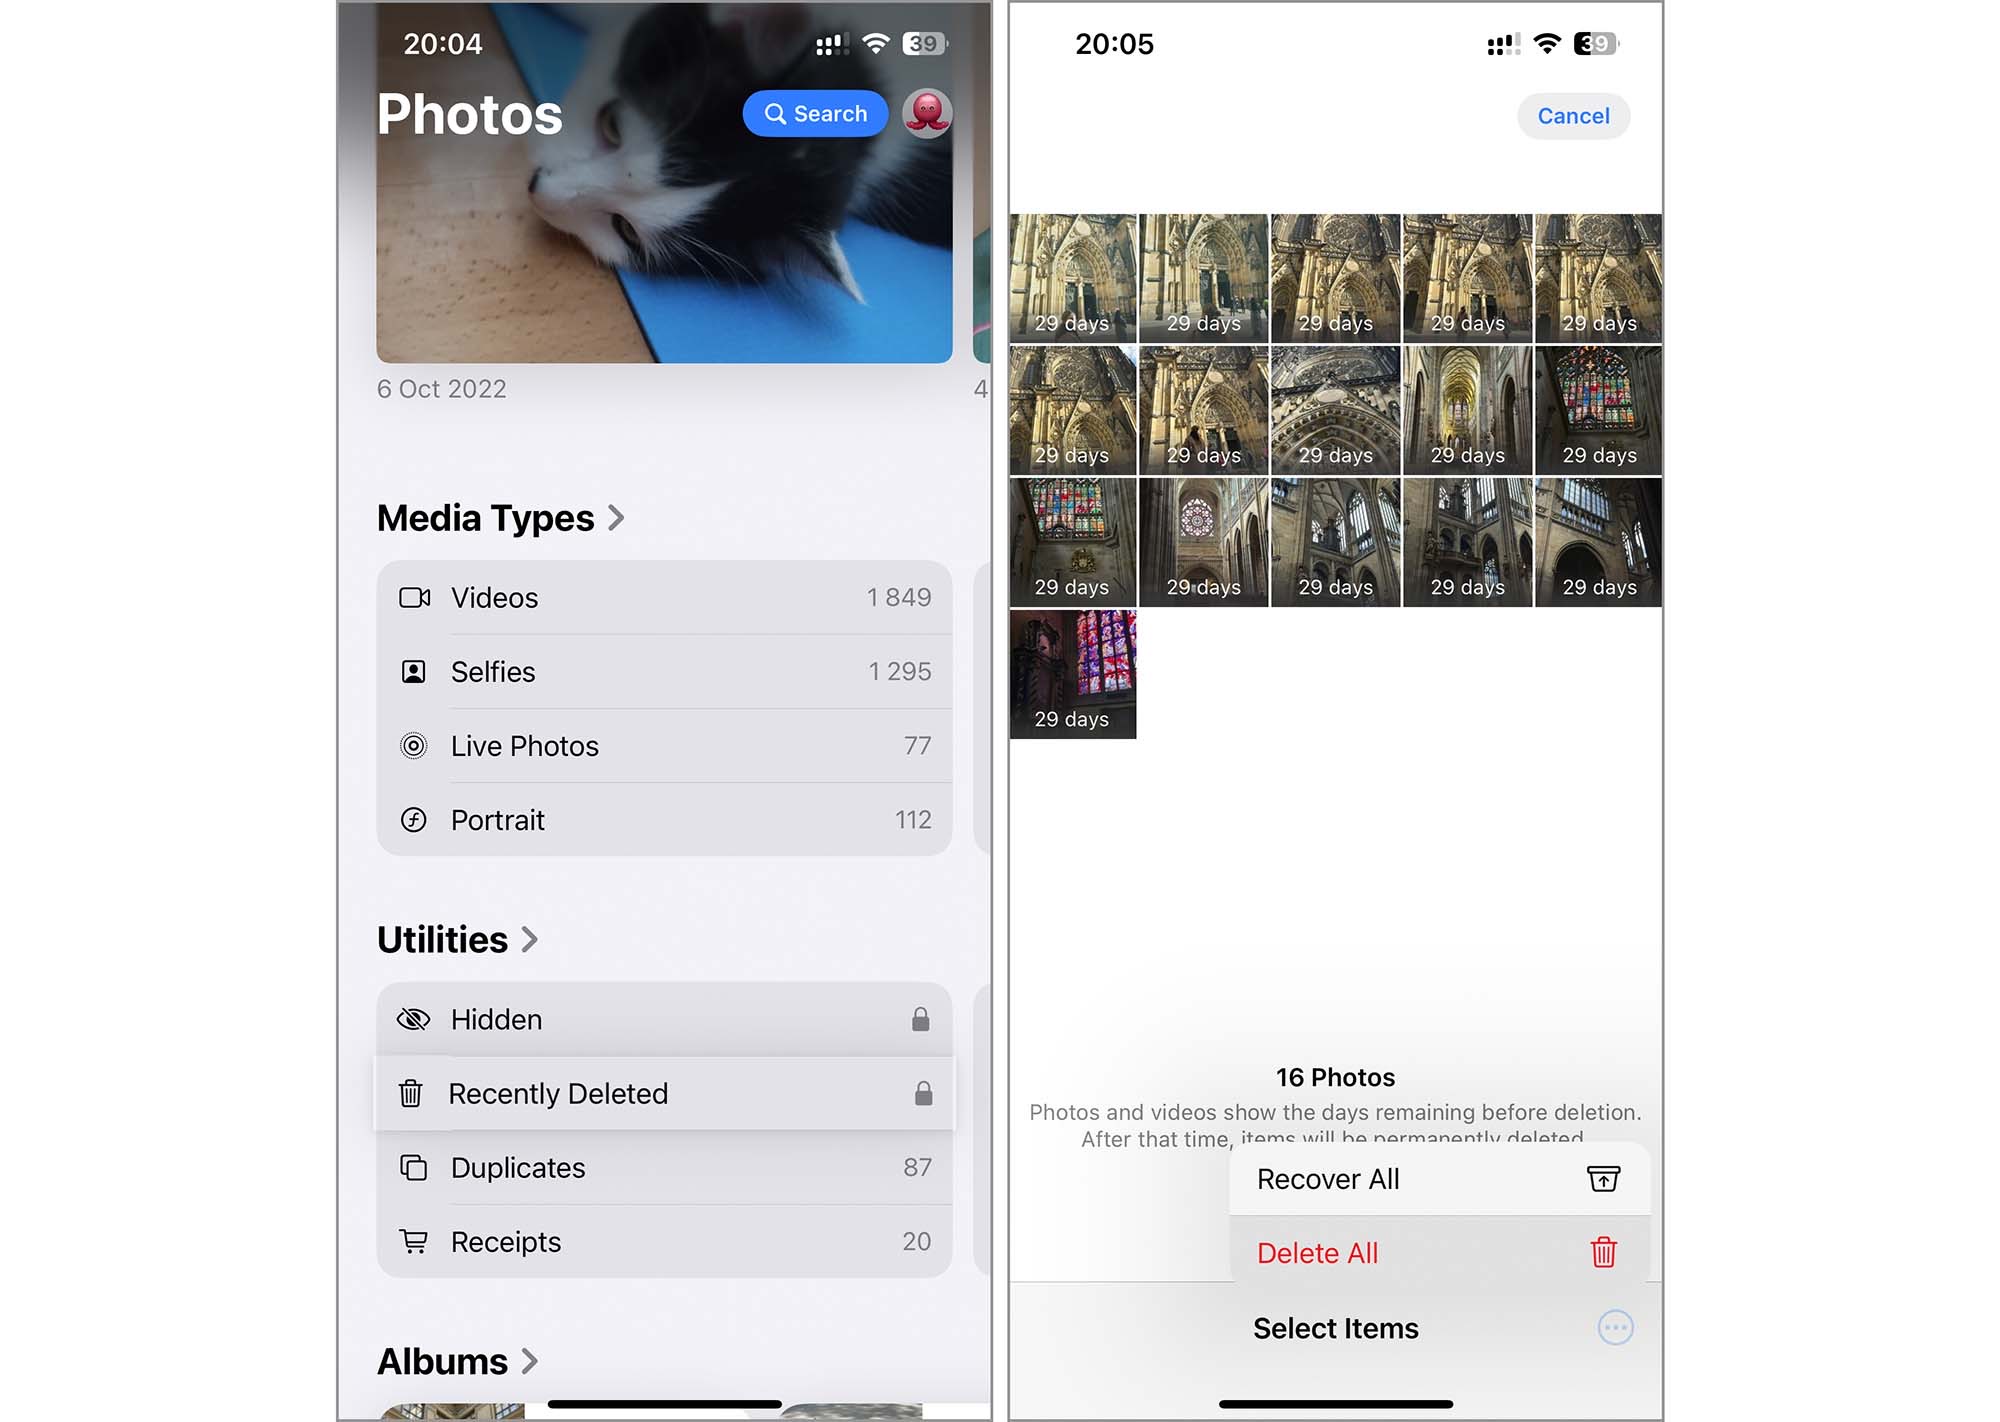
- Tap on the Photos icon on your iPhone to open the app.
- Scroll down to the bottom of the Utilities tab until you find the Recently Deleted album.
- Tap on the Recently Deleted album to view all the photos and videos it contains.
- Tap ‘Select’ in the top right corner of the screen, then choose either ‘Delete All’ to remove all items or select individual photos that you wish to delete.
- Tap ‘Delete from this iPhone’ and confirm that you want to permanently remove the selected photos from your iPhone. This action cannot be undone.
Note: If you deleted a photo from the Photos app but forgot to clear the Recently Deleted album, don’t worry. In the latest iOS versions, accessing this album requires authentication with your Apple ID or password. This added security provides that even if someone gets hold of your iPhone, they won’t be able to retrieve your deleted photos.
If you regularly back up your iPhone using iTunes/Finder or have automatic iCloud backups enabled, it’s important to create a new backup after emptying the trash. This prevents deleted photos from reappearing if you ever restore your iPhone.
5. Perform a Factory Reset to Erase All iPhone Data
The last option to safely and permanently delete photos on your iPhone is to perform a factory reset. However, use this method with caution; it erases not just photos but all personal data, apps, and settings. This is the best way to guarantee no trace of your data remains, which makes it ideal if you’re selling or giving away your device rather than just clearing a few photos.
Note: If you have already emptied your Recently Deleted album and plan to perform a factory reset to confirm no one else can access your deleted photos, make sure to back up your data first. This will preserve your important files and settings before you reset your phone, effectively wiping all content from your device.
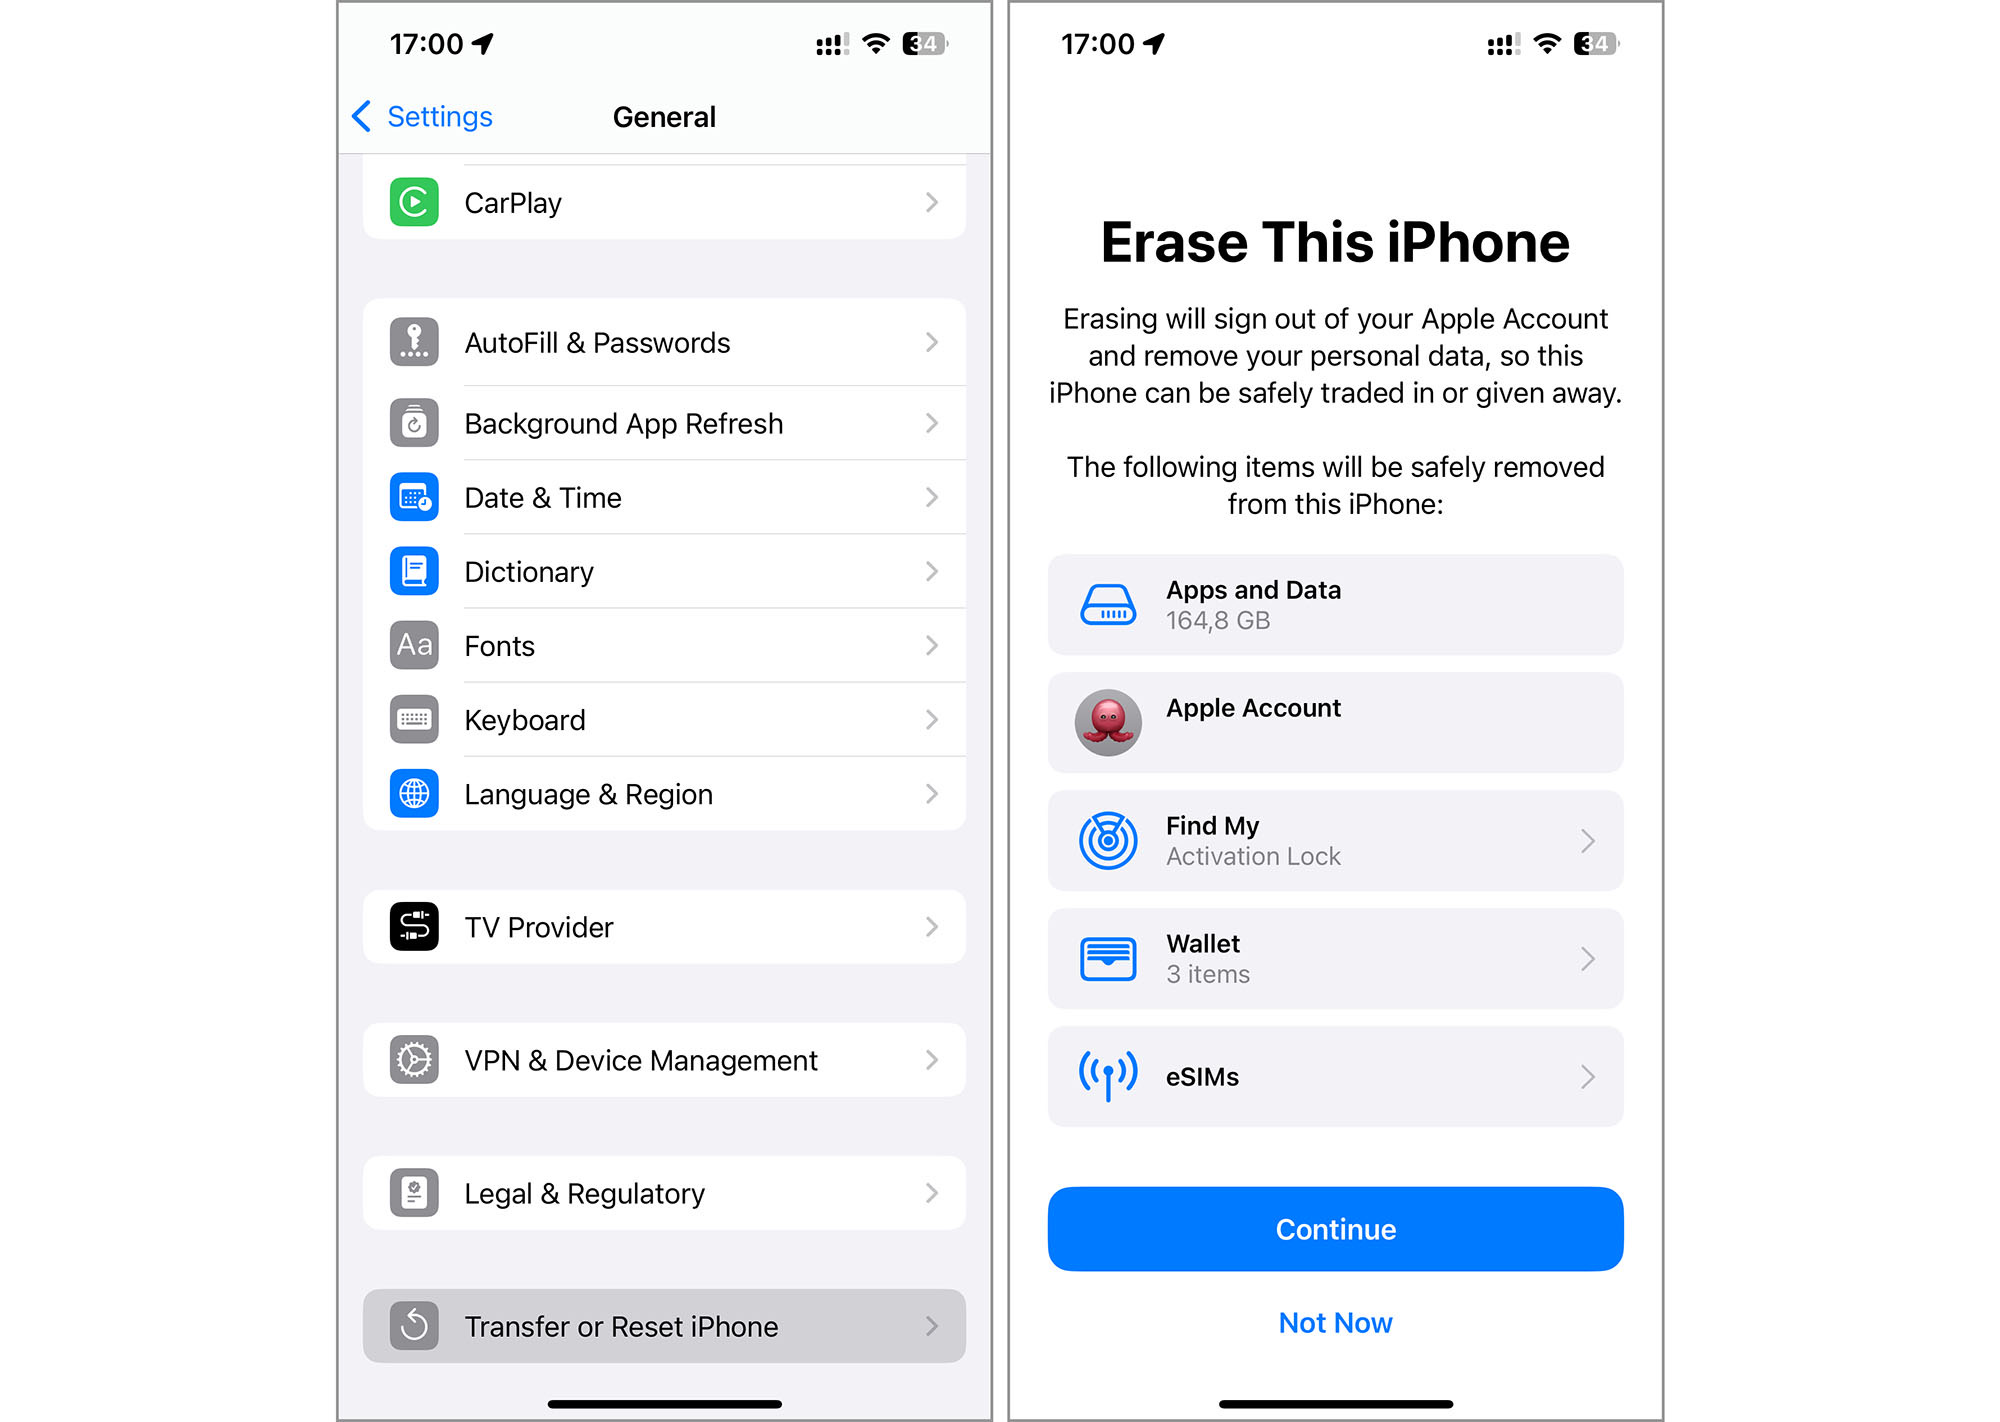
- On your iPhone, go to the Settings app, scroll down, and tap on ‘General.’
- At the bottom of the General settings, tap on ‘Transfer or Reset iPhone.’
- Select ‘Erase All Content and Settings.’ You may be asked to enter your Apple ID password to confirm the action.
- Confirm that you want to erase everything after entering your credentials. Your iPhone will begin the reset process, which can take a few minutes to complete.
- After these steps, your iPhone will return to its original factory state, free from any of your personal data and ready for a new owner without any remnants of your information.
Conclusion
Confirming a photo is fully removed means either clearing it from the Recently Deleted album (or waiting 30 days for it to disappear automatically) or performing a factory reset.
While a factory reset is the fastest way to wipe your iPhone clean, we recommend deleting photos manually first. This gives you a chance to recover any images you may have accidentally removed. If you do choose a factory reset, remember that you can only restore your photos if you have a backup that includes them.
However, restoring from a backup will bring back all deleted photos, not just the ones you want. In our opinion, the best time to reset an iPhone is when you give it to someone else, which guarantees that none of your personal data remains.